Showing posts with label baking. Show all posts

Tuesday, May 1, 2018

Cookie Number Cake

Cookie Number Cakes are all over Pinterest and Instagram. This was my first attempt. I used two batches of a classic chocolate sugar cookie recipe. It worked best to roll the dough out on parchment paper to transfer to the baking sheet. 

Topped with Target Raspberry cookies, sugar wafers, extra chocolate star cookies, Chocolate gems, Chocolate candy animals (made from custom molds), Happy Birthday chocolates, Whoppers, Pink Sixlets and bright licorice bits. The frosting was two batches of classic butter cream. 

Assembly, a few blobs of frosting under the bottom layer to secure it to the base. I used a Wilton #1 tip to make large dollops of frosting. Then I let the frosting set for about a half hour before adding the next cookie layer. Placed the second cookie on the set frosting. Then repeated the frosting dollop technique. Again, I let it set for half hour before placing on the toppings. 

We didn't even eat the cookie cake. I brought it to work. We had more than enough extra cookies from all my experiments. It's my birthday, all I wanted to do was successfully make this cake. Mission accomplished! 


Wednesday, December 23, 2015

Frosted Sugar Cookies

 Every holiday season, I made plates of my Great Grandma Marie's Famous Frosted Sugar Cookies to sell to friends, families and fans. This year, I sold 45 plates of Frosted Sugar cookies! OMG. Every year I get a bit faster at making them. And this year I pulled in the Dala horse as the new house favorite. I need to shake up the routine.

Dala horse cookies are my new holiday favorite!


 Custom Hanukkah cookies for a good friend.


Friday, December 18, 2015

PS4 Controller Custom Cookie

Recently I made custom PS4 Controller Frosted Cookie for Best Buy. Here is my little how to.

There was much improvising that happened and many attempts that did not fully work. Above is the best version and below is how to make your own.

Tools needed:
Sugar Cookie dough (homemade or store bought)
Black frosting (homemade or store bought)
PS4 template (I traced a controller and hand cut out the cookies)
Black Fondant (Cake Boss brand works well) rolled to 1/4 thickness
Tootsie Crows Licorice Gumdrops (found some at Walgreens)
Rolling pin
Medicine cup (to cut out the buttons)
Pen cap (to cut out the buttons)
Elmers or any gluestick brand cap (to cut out the buttons)
Toothpick (to make the textured dots)
Frosting for the symbols (pink, red, light blue and green)

1. Roll out your cookie dough, cut the cookies and then bake them according to the directions
2. Once the cookie is cool, frost it with the black frosting
3. Cut out the controller buttons

Controller parts from left to right:
Left:
Cut one medicine cup circle in the black fondant + hand cut arrows. "glue" them with the black frosting.

Middle top:
Cut one rectangle roughly 2" wide by 1.25" tall in the black fondant. Poke with toothpick to achieve the texture.

Middle bottom:
Cut two circles cut with the glue stick cap in the black fondant, place two Tootsie Crow Licorice Gumdrops on top. I sliced the Gumdrop in half so they were not too tall. For the middle button, cut one of the green pen caps in the black fondant. Again use the black frosting as "glue".

Right:
Cut one medicine cup circle in the black fondant. Cut four circles with the green pen cap in the black fondant. Use the black frosting as "glue" to assemble. Then use pink, green, red and light blue frosting to draw the symbols on the small circles.

Allow the cookie to air dry for a few hours before sealing in a container. This will allow the frosting to "set". 

I'll be honest, they are a lot of work. But I already figured out how to make it come together. Now it's just effort that will make it happen!

If you made it to the bottom of this post, click this link and go "like" the custom PS4 Cookie I made for Best Buy!

Wednesday, November 25, 2015

Spicy Mexican Chocolate Pumpkin Pie

I found this recipe in Better Homes & Gardens but I gave it a bit of spin after a few rounds of making it. The texture of the chocolate pumpkin layer has a French Silk Pie texture. And the heat from the chili powder and cayenne pepper gives it a nice bit of zing. It's my new favorite. Cold pie spicy chocolate pie with some hot coffee, yes please!

Spicy Mexican Pumpkin Pie:

1 Frozen Deep dish Pie Crust
1 3.1 oz disc of Mexican Chocolate (I found Nestle Abuelita Mexican Chocolate at Cub Foods)
2 TBSP butter
3/4 cup packed brown sugar
1 tsp pumpkin pie spice
1/4 tsp salt
1/4 tsp mild chili powder (I use 1/2 tsp regular chili powder)
1/8 tsp cayenne pepper (I use 1/4)
1 15 oz can pumpkin
4 eggs, lightly beaten
1 cup half and half
1 recipe for Chocolate Ganache (see below)

Prepare the piecrust, set aside to cool.

Preheat over to 350. In a small saucepan heat the chocolate disc and butter over medium-low heat, stirring constantly, just until melted. Set aside to cool. In a large bowl combine brown sugar, pumpkin pie spice, salt, chili powder, and cayenne pepper. Stir in pumpkin and eggs until combined. Gradually stir in half-and-half until combined.

Stir 1 1/2 cups of the pumpkin mixture into the cooled chocolate mixture. Pour into the piecrust. Then pour the remaining pumpkin mixture over the chocolate layer. Cover the edges with foil. Bake 60 minutes or until edges are puffed and the center appears set. Cool on wire rack. Chill within 2 hours.
Spoon Chocolate Ganache over top.

Chocolate Ganache:
3.1 oz chopped semisweet chocolate and 1/4 tsp cinnamon. In a small saucepan, bring 1/4 cup whipping cream to simmering, pour over chocolate. Let stand 5 minutes. Stir until smooth.

When ready to serve top with shaved chocolate and chili powder to your liking.


Sunday, April 5, 2015

Bunny Sugar Cookies


I saw this adorable bunny cookie idea on psimadethis.com which was created by Baked Ideas
I thought "perfect, I can totally do that". My kids are allergic to whole eggs, so frosted cookies have become our Easter standard. I found some Wilton candy decorations at Target and Michaels. The glasses make this cookie the BOMB.

 
They are very easy to make. I am so serious. It is a regular gingerbread man cookie cutter, then one circle cookie cutter cut in half. We pressed in regular classic jellybeans and shaped the hands around the candies. We tried Starburst Jelly beans too, but the old school ones worked best. We also tried adding the sugar candies. They worked great! Baked at 350 for 8-10 minutes.

And of course, we made some eggs too!

Monday, February 9, 2015

Salted Caramel Chocolate Cakeball Truffles

Yum! Salted Caramel Chocolate Cakeball Truffles. My eldest, loved them and she is miss picky pants. I make the caramel sauce from regular caramels (the ones that are individually wrapped) in the baking aisle. I toss the caramels in a pot and melt them slowly on low heat with a bit of heavy cream. The salt is best as freshly ground Sea Salt.

Saturday, January 31, 2015

Valentine's Day Cakeball Truffles

My daughter had two friends over for a sleepover. I thought it was time to let them take over on the cakeball truffle business. They can do it! Sure, they are not perfect-perfect but they still taste great. This time we made strawberry with dark chocolate. Every treat is better with sprinkles.

And then we took turns coloring on the Cuties with permanent markers.

Sunday, May 4, 2014

turtle bread


My kids love their bake shop apps on their coveted devices but this morning we had a real bake shop in our house. The recipe is a sourdough bread but really any bread dough should work just fine. One big body shape, four little feet and a head. We cut raisins in half for the eyes. Then carve a little hole for the the raisins with a knife-push the raisins in the dough hole. Then cut the lines for the turtle shell.  Lightly oil a baking sheet and place the turtles to rise for a half hour under a light-weight towel.  Bake at 375 for 20-25 minutes. Check around 15 minutes to see how everything is looking. 

Monday, January 6, 2014

Raspberry Linzer Heart Cookies (no nuts)


  • 16 tablespoons (2 sticks) unsalted butter, at room temperature
  • 2/3 cup plus 3 Tbsp. confectioners' sugar
  • large egg yolk 
  • 1 teaspoon vanilla extract
  • 2 1/2 cups all-purpose flour
  • 1/4 teaspoon salt
  • 2/3 cup seedless raspberry jam 

  • Preheat oven to 325°F; line 2 baking sheets with parchment. Beat butter and 2/3 cup sugar until fluffy. Beat in egg yolk and vanilla, then flour and salt. Shape dough into 2 disks; wrap 1 in plastic and refrigerate.
  • On a floured surface, roll out remaining disk to about a 1/8-inch thickness. Cut out cookies with a 2 1/2-inch heart-shaped cutter. Use a smaller heart cutter to cut a window out of half of cookies. With a spatula, carefully transfer cookies to prepared baking sheets. Repeat with remaining dough. Gather scraps and roll out again to make more cookies.
  • Bake cookies in batches until edges of cookies are just golden, 10 to 12 minutes. Let cool for 5 minutes, then transfer cookies onto wire racks to let cool completely.
  • Spread 3/4 tsp. jam over flat side of each cookie that doesn't have a window. Top with remaining cookies, flat side down, so that jam shows through windows. 
  • *Note, you can also dust the cookies with confectioners sugar. Before sandwiching the cookies together, lay the cookies with the windows out. Carefully sift 3 Tbsp. confectioners' sugar over cookies. Then sandwich the window cookies on top of the jam. (I skipped this part. I figured there was enough sugar in the cookies.)

Monday, October 15, 2012

pumpkin rice krispie bars

{thekitchn.com}
Pumpkin Rice Krispie Treats

3 tablespoons unsalted butter
1/4 cup canned pumpkin puree
1 (10 ounce) bag mini marshmallows plus one cup
1/4 teaspoon pure vanilla extract
1/4 teaspoon ground cinnamon
Pinch of allspice
Pinch of freshly grated nutmeg
Pinch of kosher salt
6 cups crispy rice cereal
Butter a 9x13-inch baking dish (or a smaller dish — see Note below).

In a heavy saucepan or Dutch oven, melt butter over medium-low heat. Add the pumpkin puree and continue to cook until it is warmed through. Fold in 10 ounces of the marshmallows, stirring frequently until almost completely melted. Stir in vanilla, cinnamon, allspice, nutmeg, and salt, and remove from heat.

Allow the marshmallow mixture to cool 10 minutes; fold in the remaining cup of marshmallows. Continue to cool the mixture for another 20 to 25 minutes until it is room temperature (failure to cool the mixture will result in soggy rice crispy treats.) Add the puffed rice cereal and stir, using a silicone spatula, until combined.

Press the mixture into the greased rectangular baking dish. Let set for 30 minutes before cutting and serving.

Sunday, September 16, 2012

DIY truffles

{marthastewart.com}

I found the recipe on pinterest. It is a Martha Recipe. I modified it a bit. I passed on the orange peel. I am sure it would be wonderful with an orange peel, but the oranges at my store looked sub-par.

Overall, I thought this would be easier. It was messy. I don't think I would do it again any time soon. In my mind, the truffles should have had better shape. However, the more you mess with them the more messy you get. It is best to shape the truffle once you are rolling it around in the toppings (cocoa powder, coconut, powdered sugar, or nuts). That tip was NOT on the recipe.

I think they would taste wonderful with a strong cup of coffee, but I finished creating these late at night. So maybe tomorrow morning I will enjoy one to start the day. . . Bringing them to work. . .

Thursday, September 13, 2012

chocolate dipped


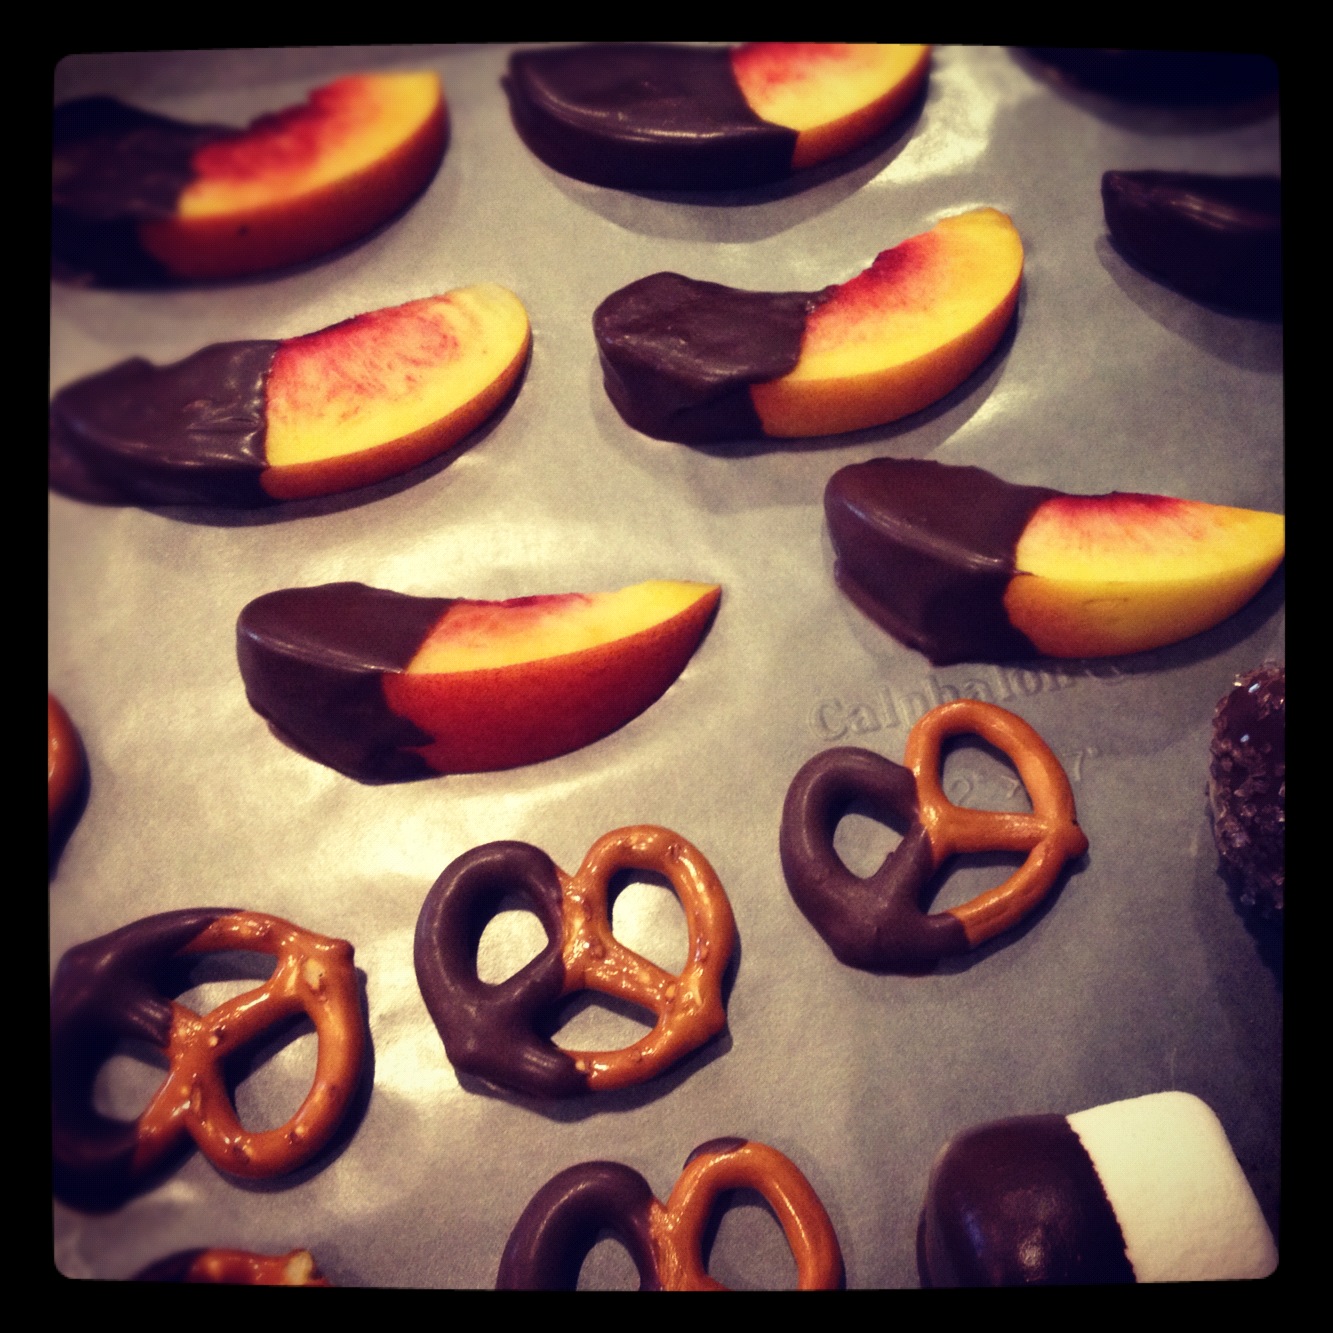
Chocolate dipped is not as scary as it might seem. Just gather up some favorite foods and some meltable chocolate wafers. You can dip anything... Potato Chips, pretzels, brownie bites, nectarines, dried mango, dried apricots, marshmallows, kiwi, strawberries, oranges, apples, bananas and pears. My husband stuck his nose up at the chocolate dipped potato chips but that only drew in my little 4 year old in for a closer look. Later I found the little guy eating four mega-sized chocolate cover chips while no one was looking. sneaky boy.

Wednesday, September 5, 2012

strawberry jello cookies

I made some Strawberry Jello Cookies with my little guy. He loves to roll the cookie balls in sugar. He feels so important, concentrating by sticking his tiny tongue out the side of his mouth. I wanted to add a bit more to the cookies, so I dipped them in Mint Chocolate. If I made these again, I think I would do Raspberry or Lime.

Recipe from {justhelen.net}

1/2 cup shortening
1/4 cup butter
1/2 cup granulated sugar
1 – 3oz. pkg of Jell-O ( I used raspberry, orange, lemon and lime flavors…but my very favorites are raspberry and lime)
Cream the above ingredients.  Add:
2 eggs
1 teaspoon vanilla
Cream the eggs and vanilla into the sugar mixture.  Add:
2 1/2 cups flour
1 teaspoon baking powder
1 teaspoon salt
Mix well.  The dough will be fairly soft, but not sticky.  You don’t need to refrigerate the dough before rolling.  I like to use a scoop to make my cookies more uniform in size. 
Pre-heat oven to 400°.  Roll dough into 1″ to 1 1/4″ balls and then roll in a bowl with about 1/2 cup of granulated sugar in it, completely covering the exterior of the dough ball.  Place on the pan about 2″ apart.  Using a flat-bottomed glass (or bowl) press the dough to about a 3/8″ thickness. 

Tuesday, September 4, 2012

butterfly cakes


{brandcastle.com}

Stella, my nine year old received a little silicone butterfly kit for her birthday (ah, way back in May...). We finally made the cute little kit. I thought it would be nice way to end the summer. School starts tomorrow. She will be a 4th grader!

I finally completed her iphoto book tonight, for her third grade year. In the last year she has changed so much. She doesn't have that sweet baby face anymore. She is looking more and more like a soon-to-be-grown-up-gal. She loves to watch Project Runway with total seriousness she'll proclaim, "Well, they tried their best but that is not working". The other night while shopping (just the two of us, which NEVER happens) she remarked, "Sometimes you can totally trick boys, because they are kinda dumb". I know, at the age of nine I did not have that much wisdom. I cannot wait to see what she will do with her life.

Tonight, a friend of mine posted on facebook, that tomorrow is the last "first day of school" for her oldest (going into her senior year). Ouch, a bit of heartbreak there but happiness in the same. I am so excited for this year to start. The kids are seriously going batty at home. I can't wait to see their little art projects, hear who is chasing who at recess and see who they start to become.


Look at this cute note that the teacher sent home on back to school night.