Showing posts with label holidays. Show all posts

Wednesday, December 23, 2015

Frosted Sugar Cookies

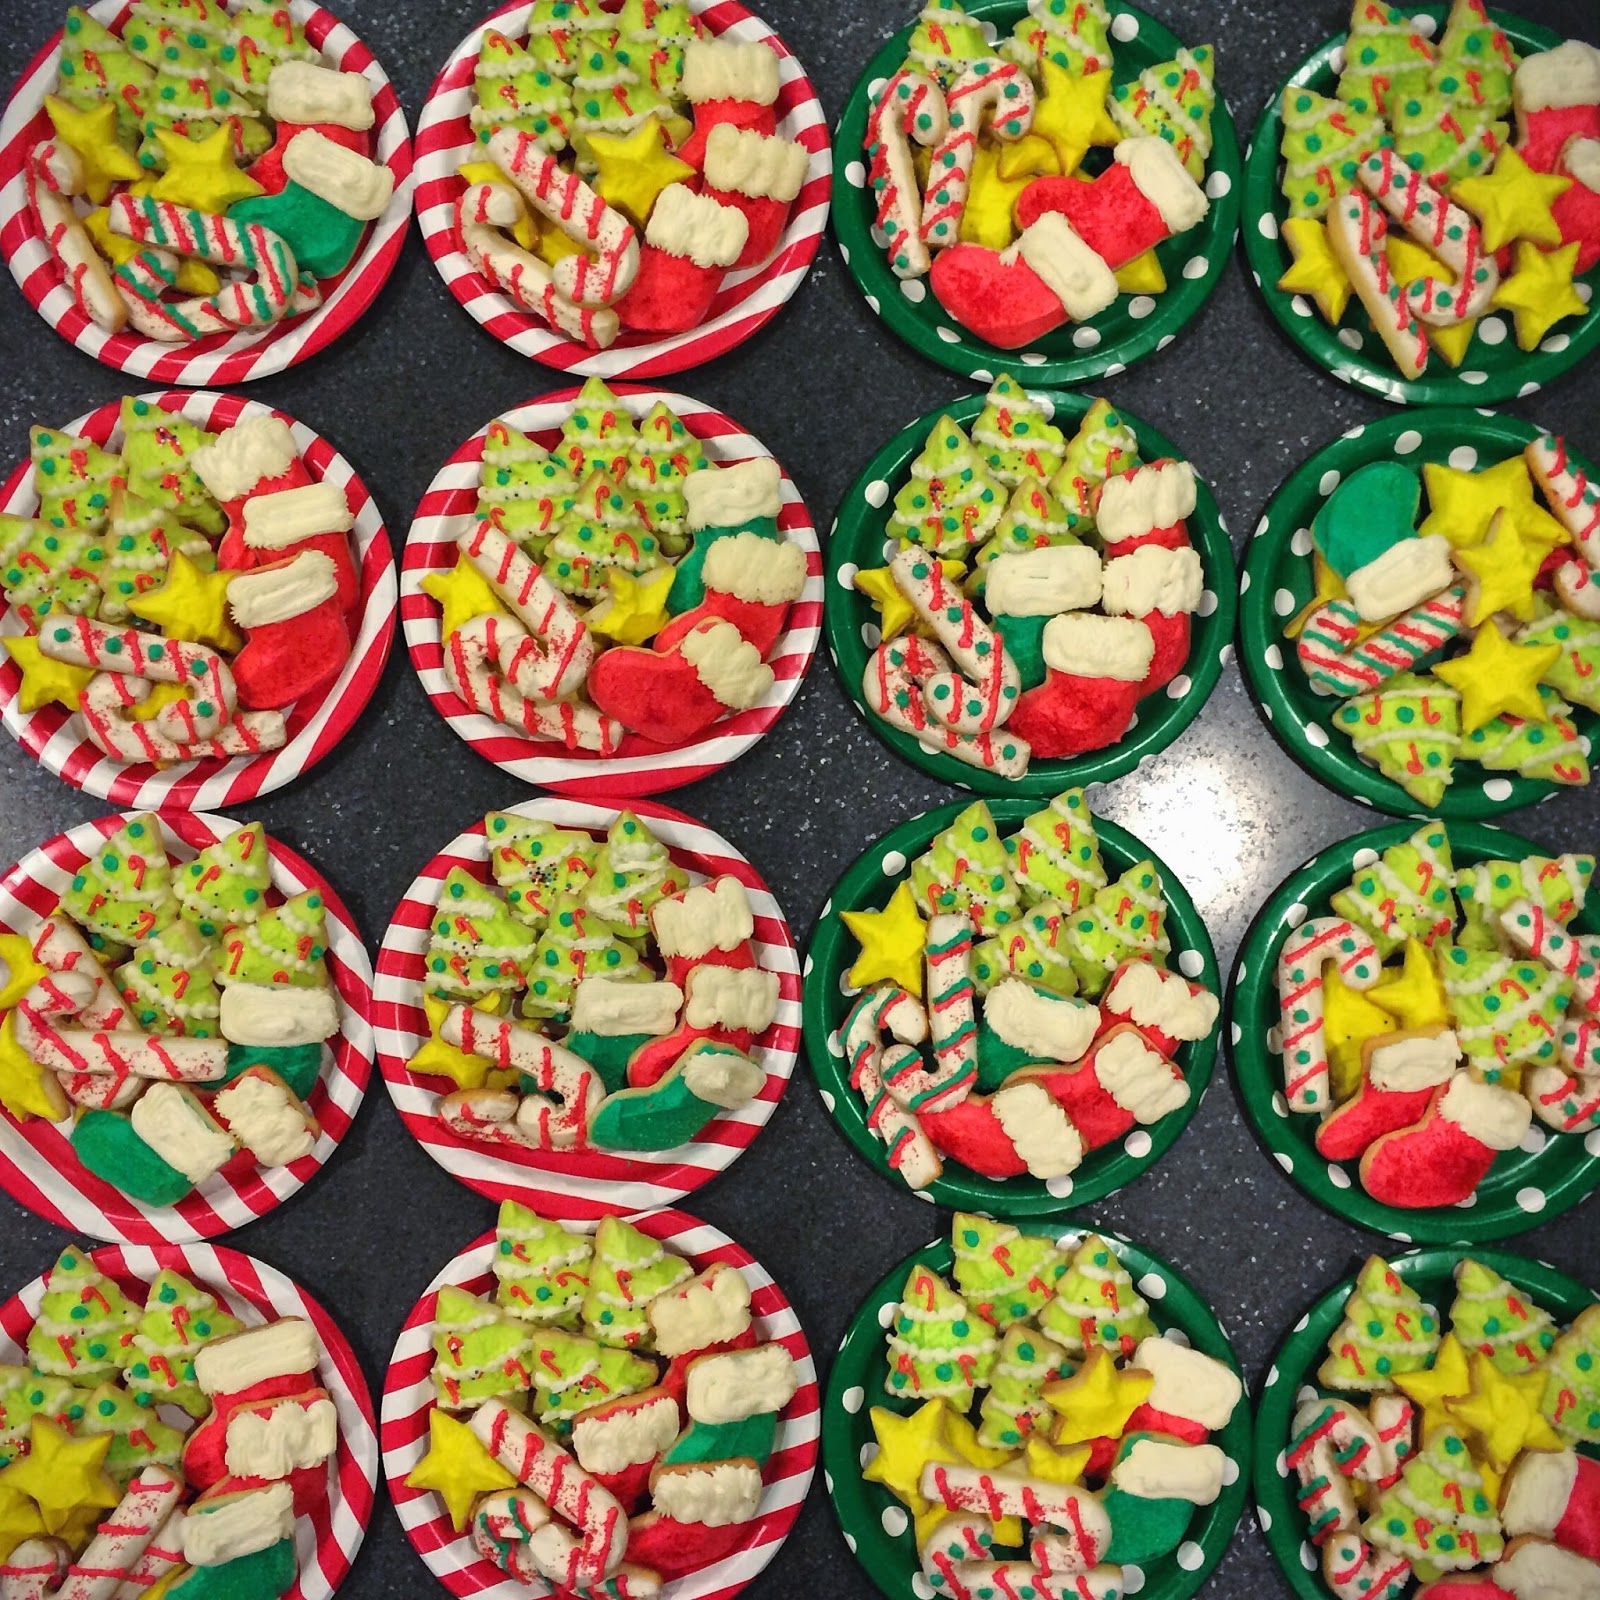
 Every holiday season, I made plates of my Great Grandma Marie's Famous Frosted Sugar Cookies to sell to friends, families and fans. This year, I sold 45 plates of Frosted Sugar cookies! OMG. Every year I get a bit faster at making them. And this year I pulled in the Dala horse as the new house favorite. I need to shake up the routine.

Dala horse cookies are my new holiday favorite!


 Custom Hanukkah cookies for a good friend.


Wednesday, November 25, 2015

Spicy Mexican Chocolate Pumpkin Pie

I found this recipe in Better Homes & Gardens but I gave it a bit of spin after a few rounds of making it. The texture of the chocolate pumpkin layer has a French Silk Pie texture. And the heat from the chili powder and cayenne pepper gives it a nice bit of zing. It's my new favorite. Cold pie spicy chocolate pie with some hot coffee, yes please!

Spicy Mexican Pumpkin Pie:

1 Frozen Deep dish Pie Crust
1 3.1 oz disc of Mexican Chocolate (I found Nestle Abuelita Mexican Chocolate at Cub Foods)
2 TBSP butter
3/4 cup packed brown sugar
1 tsp pumpkin pie spice
1/4 tsp salt
1/4 tsp mild chili powder (I use 1/2 tsp regular chili powder)
1/8 tsp cayenne pepper (I use 1/4)
1 15 oz can pumpkin
4 eggs, lightly beaten
1 cup half and half
1 recipe for Chocolate Ganache (see below)

Prepare the piecrust, set aside to cool.

Preheat over to 350. In a small saucepan heat the chocolate disc and butter over medium-low heat, stirring constantly, just until melted. Set aside to cool. In a large bowl combine brown sugar, pumpkin pie spice, salt, chili powder, and cayenne pepper. Stir in pumpkin and eggs until combined. Gradually stir in half-and-half until combined.

Stir 1 1/2 cups of the pumpkin mixture into the cooled chocolate mixture. Pour into the piecrust. Then pour the remaining pumpkin mixture over the chocolate layer. Cover the edges with foil. Bake 60 minutes or until edges are puffed and the center appears set. Cool on wire rack. Chill within 2 hours.
Spoon Chocolate Ganache over top.

Chocolate Ganache:
3.1 oz chopped semisweet chocolate and 1/4 tsp cinnamon. In a small saucepan, bring 1/4 cup whipping cream to simmering, pour over chocolate. Let stand 5 minutes. Stir until smooth.

When ready to serve top with shaved chocolate and chili powder to your liking.


Sunday, April 5, 2015

Bunny Sugar Cookies


I saw this adorable bunny cookie idea on psimadethis.com which was created by Baked Ideas. 
I thought "perfect, I can totally do that". My kids are allergic to whole eggs, so frosted cookies have become our Easter standard. I found some Wilton candy decorations at Target and Michaels. The glasses make this cookie the BOMB.

 
They are very easy to make. I am so serious. It is a regular gingerbread man cookie cutter, then one circle cookie cutter cut in half. We pressed in regular classic jellybeans and shaped the hands around the candies. We tried Starburst Jelly beans too, but the old school ones worked best. We also tried adding the sugar candies. They worked great! Baked at 350 for 8-10 minutes.

And of course, we made some eggs too!

Saturday, March 28, 2015

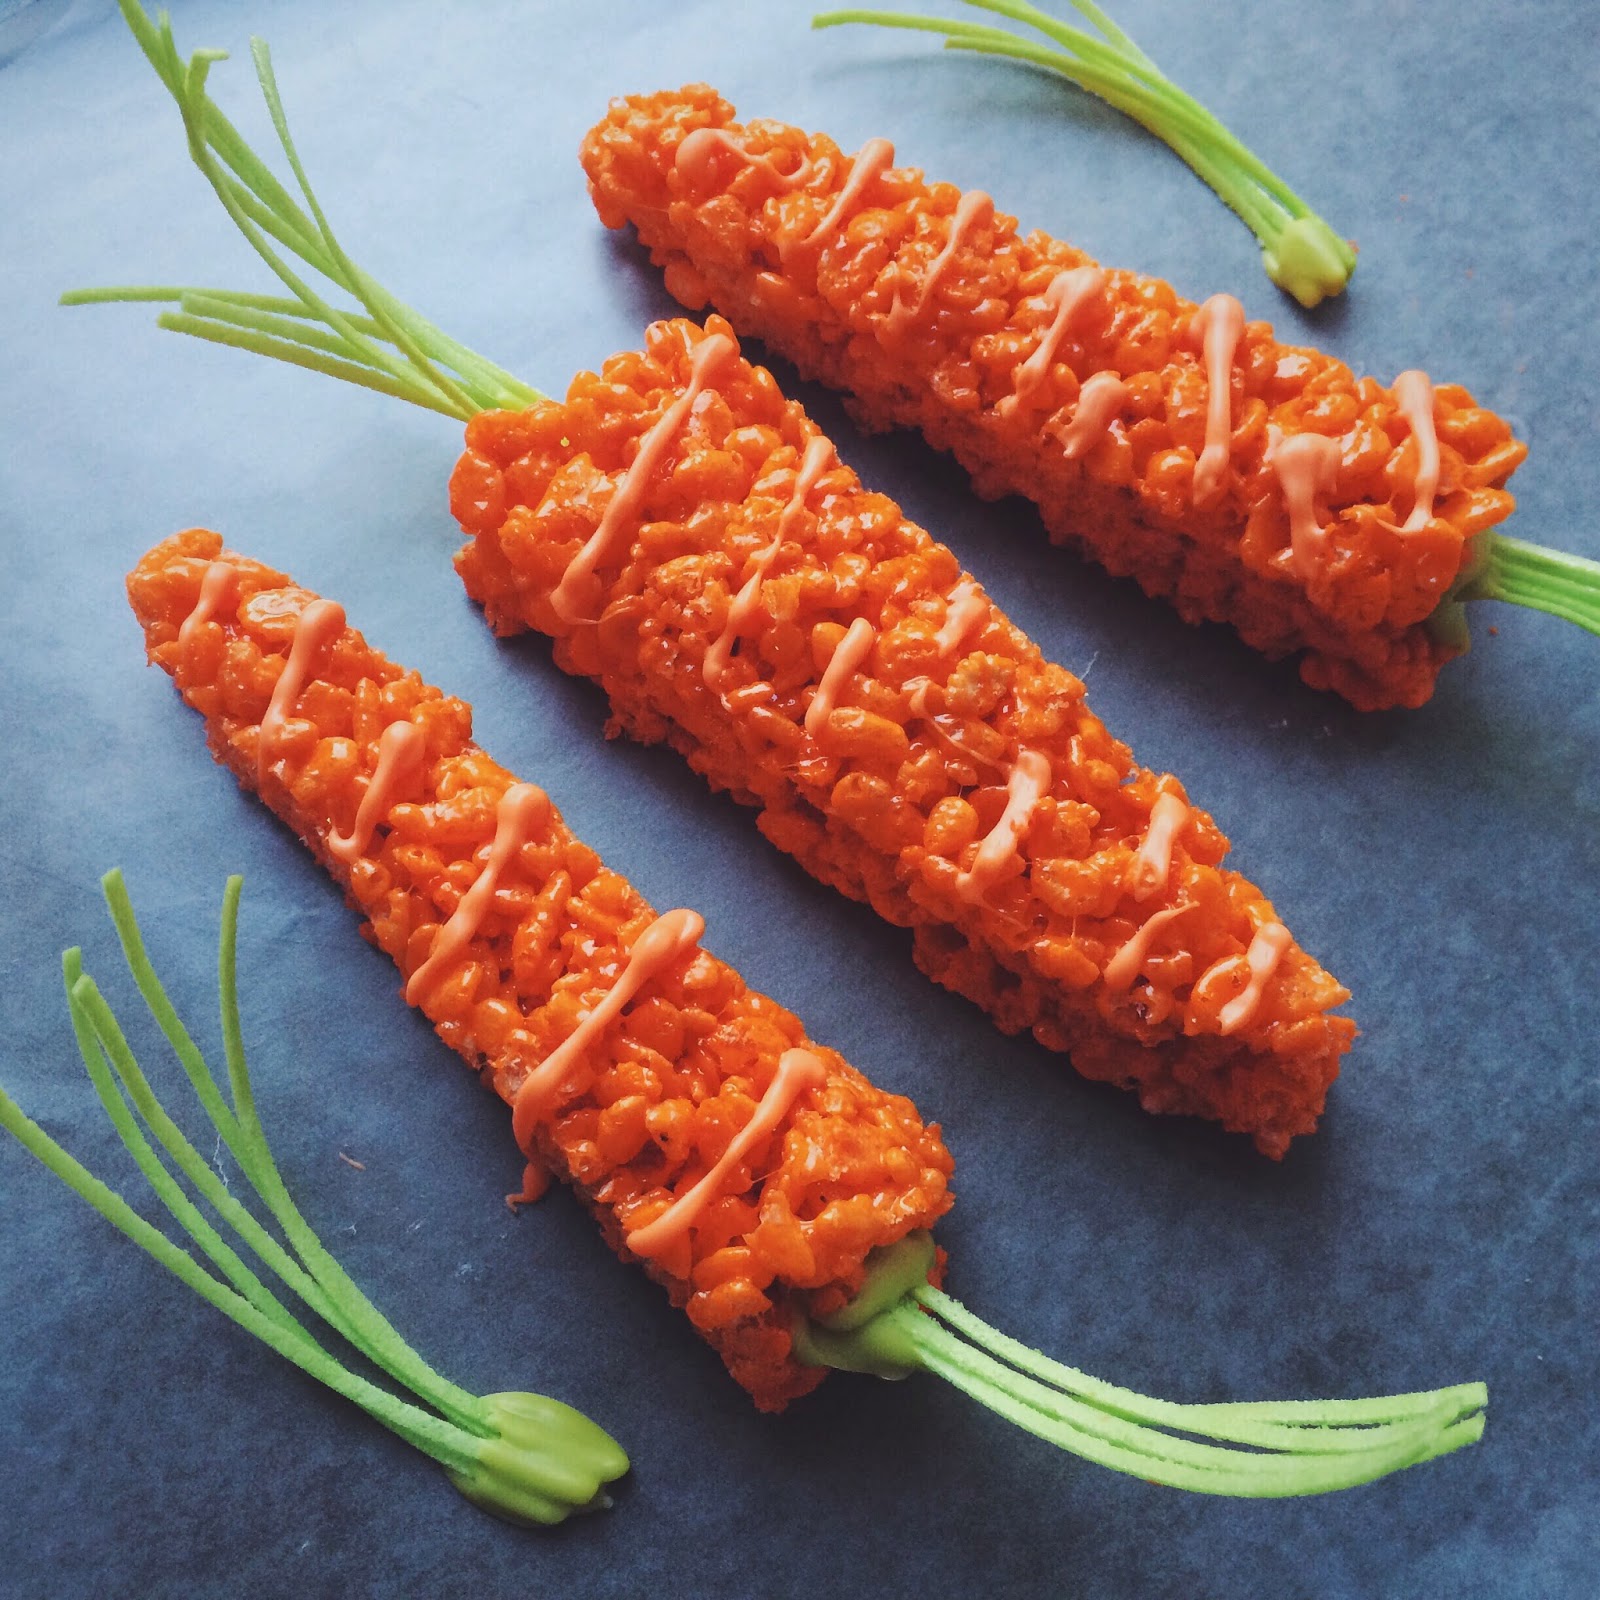
Rice Krispie Carrots

Spring is all about Easter business. My kids are allergic to eggs, so we usually make Bunny Bread, Frosted Sugar Cookies, Carrot veggie pizzas and now… Rice Krispie Carrots! 

When our youngest was little, he would say "Tarrots are Tasty. Bunnies love Tarrots". Now he is big and was a great little helper arranging bunches of edible grass. 

Ingredients:
3 TBS butter or margarine
1 pkg 10 oz mini marshmallows
Orange food coloring (the amount you would like)
6 cups Rice Krispies
Edible Easter Grass
Green Candy melts
Orange Candy melts

In a medium sauce pan, melt the butter/margarine, add the marshmallows and then the orange food coloring. In greased bowl, measure out 6 cups of Rice Krispies. Start pouring the melted mixture into the bowl of Rice Krispies, mix as you go. Nicely grease a 9x13 pan with butter/margarine and evenly spread the orange Rice Krispie mixture. Press it down evenly and let it cool. I cut the pan into 24 carrot shapes (long triangles). 

For the grass topper, I used Edible Easter Grass from Target. It is Green Apple flavored but I really could not taste it. It comes in long strands, I cut them smaller and made bunches of 5-7 strands. I used Wilton Candy Melts as "glue" to hold the grass together. Once that bunch of grass is cool, carve a little hole in the carrot and add the grass bunch with a bit more of the candy melts. 

For the final detail, you could add orange candy melt drizzle for carrot texture. I placed the melted candy melts in a sandwich sized Ziploc bag, snipped the corner in order to drizzle the carrots.


Tuesday, March 24, 2015

Bunny Bread

A few years ago, we made Bunny Bread. My kids loved it, so we hopped to it once again this year. It looks complex, but it really isn't. I tossed some poppy seeds to add visual depth for the bunny ears.


The key is to let the dough rise after the bunny is shaped. Do not skip that step. This photo shows the bunny before we baked it.

Click here for more detailed directions.


Sunday, December 28, 2014

Melting Snowmen

So adorable, right? Yes! The snowman head is an Oreo Truffle or a Cakeball Truffle coated with Bright White Candy melts. I made the heads first, allowed them to set. Then I made the melting puddle of white candy melt, place the snowman head in the melted puddle. Be sure to add the buttons before the chocolate puddle sets. The carrot nose is a Candy Coated Sunflower seed (from Trader Joe's). I drew the faces with Wilton's Edible Markers.
The hat is a mini Oreo cookie (just one side) with a Rolo. I used Candy Melts to secure the Rolo to the cookie. Be sure to attach the hat to the snowman head before the Candy Melts set. I also added a tiny slice of Twizzler to be a flower.
I also tried to make the snowmen faces with mini chocolate chips. I found it to be really tricky. I like the edible markers better. Just use your 40% coupon at Michaels or JoAnns to purchase the edible markers.

Thursday, December 25, 2014

Santa drop

Naughty or Nice sign is from the Target Dollar store. The white deer head is also from Target Holiday 2013. The La-Z-Boy chairs have a Todd Oldham houndstooth pattern. My Mother-in-law ordered up these hand-crafted stockings from a friend in Iowa.

This year our little one confessed that he was sure he was on the naughty list but somehow, last minute Santa must have placed him on the good list. A giant sized HexBug Strandbeast and Zoomer Dino are parading through our home.

Wednesday, December 24, 2014

Cookie Business


This holiday I just went for it, I made 10 batches of my Great Grandma Marie's Famous Frosted Sugar cookies. No I did not count how many cookies 10 batches renders. I am sure my chiropractor would tell you that I should take a break. The cookies really are the BOMB. They are so smooth and I sneak a bit of lemon extract in the frosting for something different. Lemon extract was never in the original recipe. It's my own addition. My Aunt Betsy also makes these famous cookies. She would NEVER stray from the original recipe. I enjoy a little shake up. I have never been one to conform.

Sunday, December 21, 2014

Gingerbread

Gingerbread is heavenly. I could sniff these cookies for hours. My daughter feels the same way. This year I bought new cookie cutters that allow the cookies to sit on the edge of the coffee cup. Obviously I need to try a different gingerbread recipe. Next time they will be functional.

If you want to give it a try, the cookie cutters can be found at Ingebretsen's in Minnesota. Not in Minnesota? No problem. I am sure you could find this on the internet, like right here!

Saturday, October 18, 2014

Rice Krispie Turkey Drumsticks + Pumpkins

Yes! I finally made them. I saw these Rice Krispie Turkey Drumsticks a while ago and finally found the time to make them. My daughter had a sleepover this weekend. Sixth grade girls had no problems making these treats. So cute and even more cute when small children eat them. 

Wonder how to make them? You will need Rold Gold Pretzel Rods, mini marshmallows, white candymelts, Rice Krispies, butter and marshmallows. First step, cut the Pretzel Rod in half with a sharp knife. Melt your white candymelts according to directions, lightly dip mini marshmallows in the chocolate and attach to the ends of the pretzels. Let them rest on a sheet of waxed paper and wait for them to cool. Next dip one end of the pretzel in the white chocolate (only half way on the pretzel), tap off excess, allow to cool on wax paper.

While the pretzel bone is cooling. You can make a batch of regular Rice Krispies bars. I prefer to make them in the microwave. Allow the prepped rice krispie treats to cool a bit before you handle them. Butter up your hands. I tried to use coconut oil and it did not work. Butter is best. I don't think I used more than one tablespoon of butter on my hands for all of the drumsticks. Form the faux turkey meat on the pretzel bone (the side without the white chocolate). The will store well in an air tight container. However in my house, they were gone too quickly. 


If the turkey drumsticks feel like too much work, then this is the option for you. Melt the marshmallows and butter in the microwave, stir till well combined then add the food coloring. Toss in the rice krispies, allow to cool a bit. Butter up your hands, scoop up some Rice Krispies and shape into a ball. For the stem I used Tootsie Rolls but you could also use pretzels too.

I think it would be cute to add leaves too. Maybe some Fruit leather or or those Spearmint leaves? 


Monday, April 21, 2014

coconut nest cupcakes


I had intended to post this before Easter, but that did not happen. I am behind on most everything in my personal life. I have decided that this is going to be the year of "don't care". I will still give my best effort, but if something goes off course... "don't care". After the year wraps up, I will assess if this was a better method or if I should go back to my usual ways.

Tonight, my new "don't care" method worked like a gem when two different insane drivers were freaking out on me. I swear there is something going down with this blood moon business. The crazy driver tonight looked like he was having a stroke while providing me the one finger salute. The weather is warmer, so all his windows were open for full effect. Thankfully my two boys were fighting with each other in the backseat and had no clue what was going down to the right of our vehicle. I just waved at him in a friendly manner... don't care.

My favorite coworker is moving to Florida next month. I am in total denial that this is happening. She loves coconut, as do I. So I will bake coconut things to make our final days sweeter and keep myself in a sugar coma. No worries, I am still attempting to train for a 5K (way behind schedule).

I stumbled upon this recipe on pinterest from Browneyedbaker (adapted from Martha Stewart). You can visit that site or read the recipe below. The recipe seems like a lot of steps, but it is pretty easy. Heavenly coconut cupcakes. This would be cute for a baby shower too. If I made these again, I would double the recipe.


Coconut Cupcakes with Toasted Coconut Frosting (yields 12 cupcakes)

Cupcakes:
1 cup all-purpose flour
1 1/4 tsp baking powder
1/4 tsp salt
1/3 cup sweetened shredded coconut
1/2 cup unsalted butter (room temp)
3/4 cup sugar
1 egg (room temp)
1 egg white (room temp)
1 tsp vanilla extract
1/2 cup unsweetened coconut milk (well-stirred)

Coconut Frosting:
1 cup unsalted butter (room temp)
2 1/2 cups powdered sugar
2 tsp vanilla extract
1 tsp coconut extract

Toppings:
1 cup toasted coconut
Assorted chocolate eggs or whopper eggs (I used Cadbury Mini eggs)

Directions:
Preheat oven to 350. 12 paper liners of your choice.

I chopped up the coconut on the cutting board. But if you are fancy and have a food processor, toss it in there (much faster). You want finely ground coconut.

Whisk together, flour, coconut, baking powder and salt.

In my Grandma's Kitchen Aid Mixer, I tossed the butter and sugar till well creamed. Add the eggs and vanilla. Drop the speed to low then alternate the flour mixture and the coconut milk until well combined.

Divide the batter between the 12 cupcake liners. Bake 18-20 minutes (I was more on the 20 minute range). Remove and let cool in muffin tin for 10 minutes. Place on wire rack to cool completely.

Time to make the frosting! Whisk attachment on the Mixer. Whip the butter for 5 minutes, drop speed to low and slowly add powdered sugar. Once everything is well combined add the 2 tsp of vanilla and 1 tsp of coconut extract (I found mine at SuperTarget).

Time to toast the coconut topping. I just tossed one cup of sweetened coconut in a small frying pan and toasted it about 5-7 minutes on medium, stirring constantly. It smells so good, like heaven. While the freshly toasted coconut is cooling in a shallow plate, frost the 12 cupcakes. You want to create a "well" on the inside of the frosting, so build the frosting walls high. Frost all the cupcakes, make sure they are equal. Then roll the sides of the frosting in the toasted coconut. Toss in some eggs/jelly beans/whoppers and you are done.

Stores well in an airtight container for a few days (if you can wait that long to eat them all)!


Sunday, April 20, 2014

Bunny Pancake

Hip Hop, check out this coconut fluffy banana slice tail with chocolate tip toes. No worries, this does not have to be perfect. My kids loved drenching the bunny in strawberry syrup to re-enact a death-like moment. Of course, they added many more chocolate chips to the sticky massacre.

Sunday, January 19, 2014

Mustache Valentines


I made some Mustache Crayons a few weeks ago. This weekend, I made backer panels for the crayons. Since the kids will be taking these in their backpacks, I slipped the crayons in 2.25" x 3.5" Glassine envelopes and taped them in place with some Washi Tape (polka dots and stripes). I am debating sliding the cards into the Chevron striped bags. They look pretty sweet. 

I ensured that the copy was kosher for my Fifth Grader. She does not want to call any of the boys her Valentine or make any mention of love (her Dad is thrilled). 

Hello friend, I mustache you a question. Per chance, do you like crayons?

Valentine's Day can be a hairy situation. I made you a crayon, to smooth it over. 

I loved Valentine's Day as a kid. My Grandma Marvel would bring out an empty shoebox for us to decorate with doileys, trim and drawings. I also loved all the little cards and goodies you received from friends. I should have known in 3rd grade that I was on the designer path. It's my hope that the Valentines my kids hand out might spark the creative path for one of their friends.

done and done.


Check out my other Valentine Ideas:
Glow Stick Arrows
Award Ribbons and Ninjas
Cyclops Googly Eyes
Heart Gloves

Monday, January 6, 2014

Raspberry Linzer Heart Cookies (no nuts)


  • 16 tablespoons (2 sticks) unsalted butter, at room temperature
  • 2/3 cup plus 3 Tbsp. confectioners' sugar
  • 1 large egg yolk 
  • 1 teaspoon vanilla extract
  • 2 1/2 cups all-purpose flour
  • 1/4 teaspoon salt
  • 2/3 cup seedless raspberry jam 

  • Preheat oven to 325°F; line 2 baking sheets with parchment. Beat butter and 2/3 cup sugar until fluffy. Beat in egg yolk and vanilla, then flour and salt. Shape dough into 2 disks; wrap 1 in plastic and refrigerate.
  • On a floured surface, roll out remaining disk to about a 1/8-inch thickness. Cut out cookies with a 2 1/2-inch heart-shaped cutter. Use a smaller heart cutter to cut a window out of half of cookies. With a spatula, carefully transfer cookies to prepared baking sheets. Repeat with remaining dough. Gather scraps and roll out again to make more cookies.
  • Bake cookies in batches until edges of cookies are just golden, 10 to 12 minutes. Let cool for 5 minutes, then transfer cookies onto wire racks to let cool completely.
  • Spread 3/4 tsp. jam over flat side of each cookie that doesn't have a window. Top with remaining cookies, flat side down, so that jam shows through windows. 
  • *Note, you can also dust the cookies with confectioners sugar. Before sandwiching the cookies together, lay the cookies with the windows out. Carefully sift 3 Tbsp. confectioners' sugar over cookies. Then sandwich the window cookies on top of the jam. (I skipped this part. I figured there was enough sugar in the cookies.)

Tuesday, December 24, 2013

gingerbread donut cookies

A twist on the old classic gingerbread cookie. To spice things up this year, I cut the cookies to look like donuts. Or course, various sprinkles are a must have! I think this make the cookies even better. They are softer from all the frosting and everything is better with sprinkles.

Sunday, December 22, 2013

Veggie Pizza


Happy New Year! This veggie pizza is super easy. I am serious and you can customize the colors easily. I used a red pepper, yellow pepper and carrots to keep the colors in the warm hues. I cut the pizza into tiny squares to spell out "2014". Obviously you could spell out anything your heart desires. 

I used two (8 ounce) packages of Garlic Crescent rolls to give the pizza a bit more flavor. You could also use the Gluten Free Pizza dough from Pillsbury. 

Directions:
1. Preheat oven to 350 degrees. Spray a jellyroll pan with non-stick cooking spray.

2. Pat the crescent roll dough into the jellyroll pan. Let it stand for 5 minute and then pierce with fork. (this will help the dough from getting to puffy when it cooks, don't skip this step. Besides kids love to help with this part.)

3. Bake for 10 minutes, let it cool

4. Meanwhile, in a medium-sized bowl, combine sour cream (1 cup), cream cheese (one package), dill weed (1 tsp), garlic salt (1/4 tsp) and ranch dip mix (1 oz packet from the dressing aisle). I mixed this in my Kitchen Aid Standing mixer. 

5. Once the crust is cool enough, spread the mixture on top. 

6. Meanwhile, you can cut up your veggies. I used finely diced veggies: one red pepper, one yellow pepper and some carrots. You could also use cauliflower, broccoli, celery, radish or any other types of vegetables. Cover the pizza to your desired level. 

7. Cover with plastic wrap or a lid and let chill for a few hours. Cut into small squares and serve. 

This recipe is a big crowd pleaser. People are always wanting the recipe. Yum!

Saturday, December 21, 2013

candy cane pizza


Candy Cane shaped pizza with red peppers. I also made one with green and red peppers (but this one looked better). My daughter had a sleepover and her friends were so sad when I cut the pretty pizza into bits! The dough was home-made but I am sure you could buy pre-made dough at the store to speed things along.

Friday, December 20, 2013

frosted sugar cookies


It's a secret family recipe from my Great Grandma Marie. Don't fret, I bake sheet after sheet to share with friends, neighbors and co-workers. It's always a huge mess and my shoulders get way too tight, but it's a tradition since the 1950's that I must continue. I can't wait for the day that my daughter can take the lead.


Wednesday, December 18, 2013

Pom Pom Garland


I have a white Christmas tree, so colorful garland and ornaments look perfect. I have always loved pom poms and thought it could make for an easy DIY garland project.

I bought a couple bags of pom poms from the craft store and some sewing thread. At the end of the garland, I tied a loop with the thread to hook on tree branch. Then I started adding a pom pom about every two inches. Sew through the pom pom once, then go through once more again and continue. Two more inches of empty thread, then add a pom pom. While I was working I wound up the garland on a piece of cardboard to eliminate tangles.

I finished this during one movie. The kids could even help. And this year, I noticed that there are many more color options for pom poms. Yes, you can always dig around the internet to find the exact colors you like.

Saturday, December 7, 2013

DIY Clay Ornaments


As a kid, I loved those cinnamon homemade ornaments. The sad part is that they usually cracked over time. I kept with the concept of using a cookie cutter to create the shapes. And then I found a new material for the ornament, Model Magic. I had used it before and it held up over the years. I even added paint and glitter.

I cut out the shapes a few days prior and let them air dry on cookie sheets. Then I pulled out a variety of acrylic paints, glitter, Baker's twine and hot glue (faster and works better than regular glue). We made so many ornaments they ended up as gifts. My oldest had a sleepover craft night and each girl crafted six of their own ornaments.

Really you could do any shape you wanted either make a template and hand-cut it or find a cookie cutter online.